Prerequisites
- Asana account (personal or business)
- Access to Asana Developer Portal
Step 1: Create Asana Developer Account
- Visit https://asana.com/developers/
- Click “Get started” or “Login” if you already have an account
- Sign in with your Asana account or create a new developer account
Step 2: Create a New App
- Once logged in, go to your settings -> Apps, and click “Build new apps”
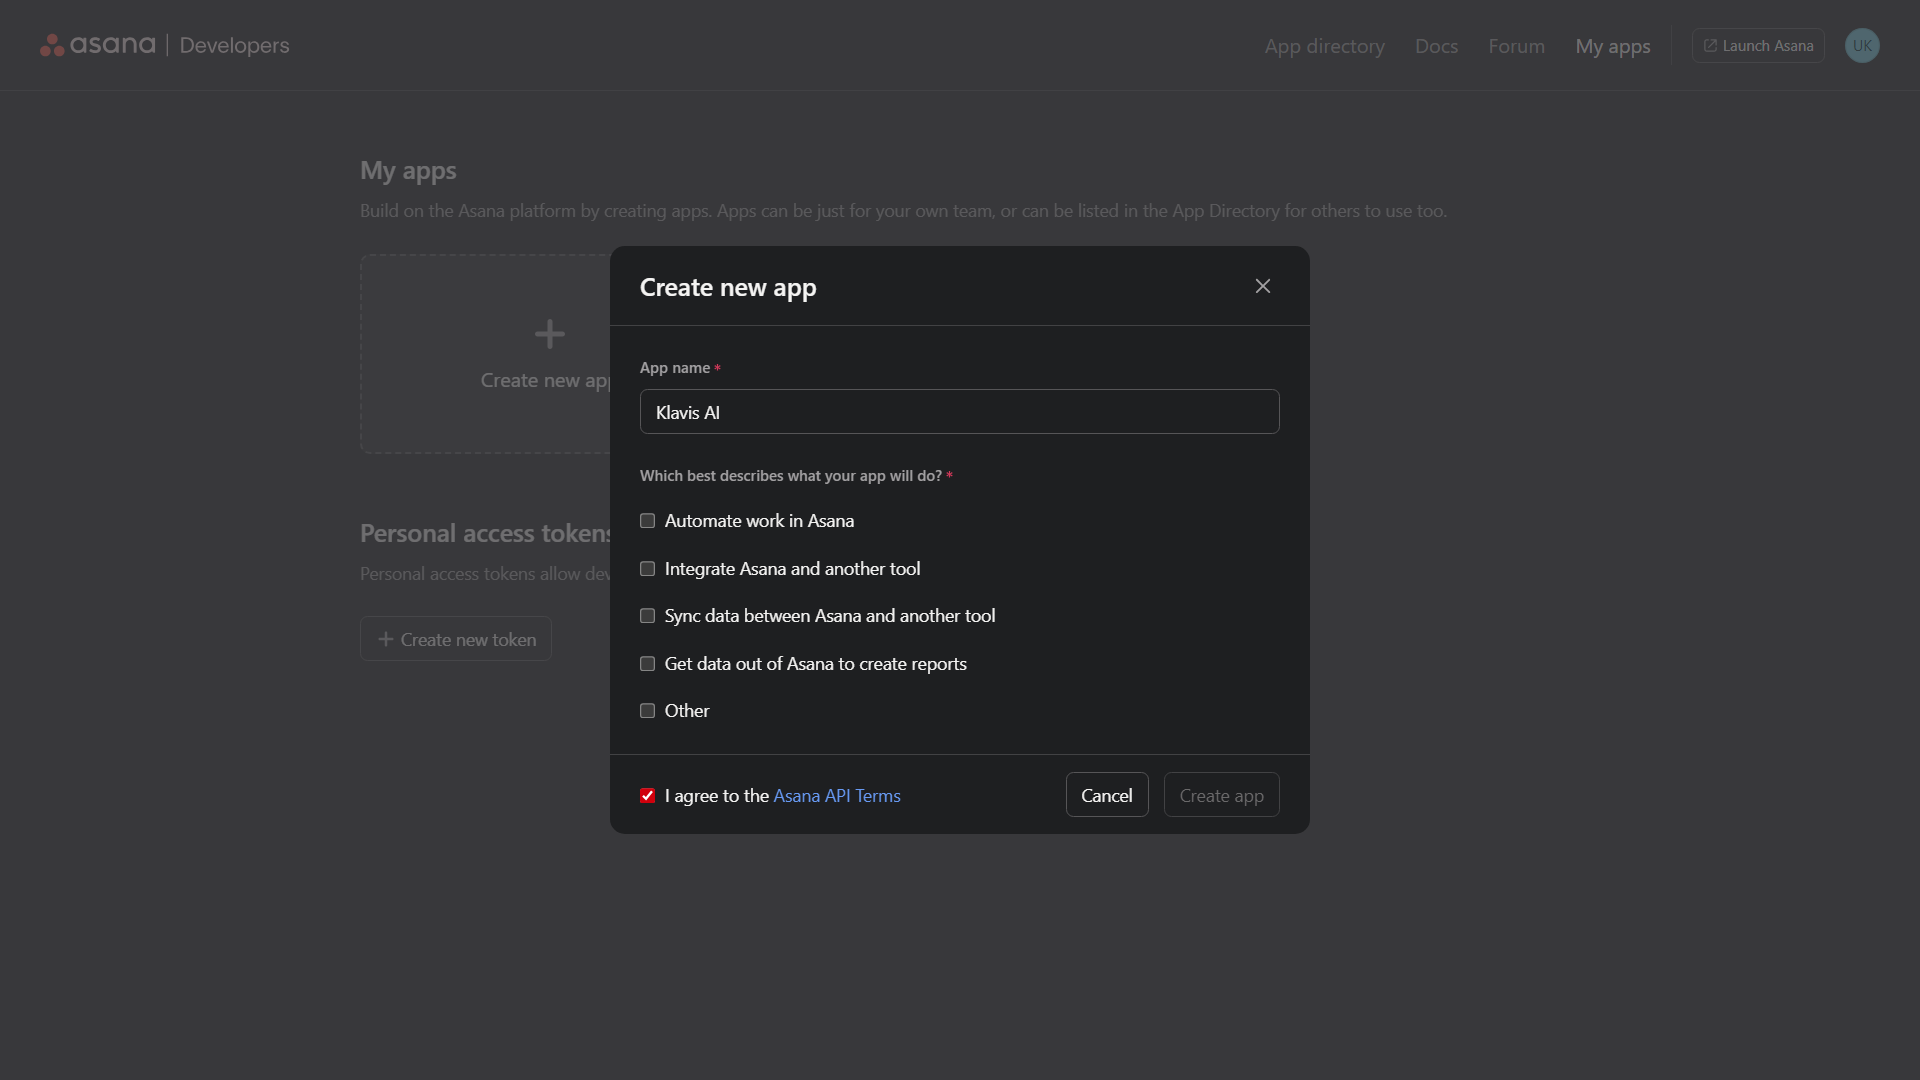
- Click “Create new app” under “My apps” section
- Fill in the app details:
- App name: Your application name (e.g., your brand name)
- Which best describes what your app will do?: (Choose your preference)
- Asana API Terms: Agree to the terms and conditions
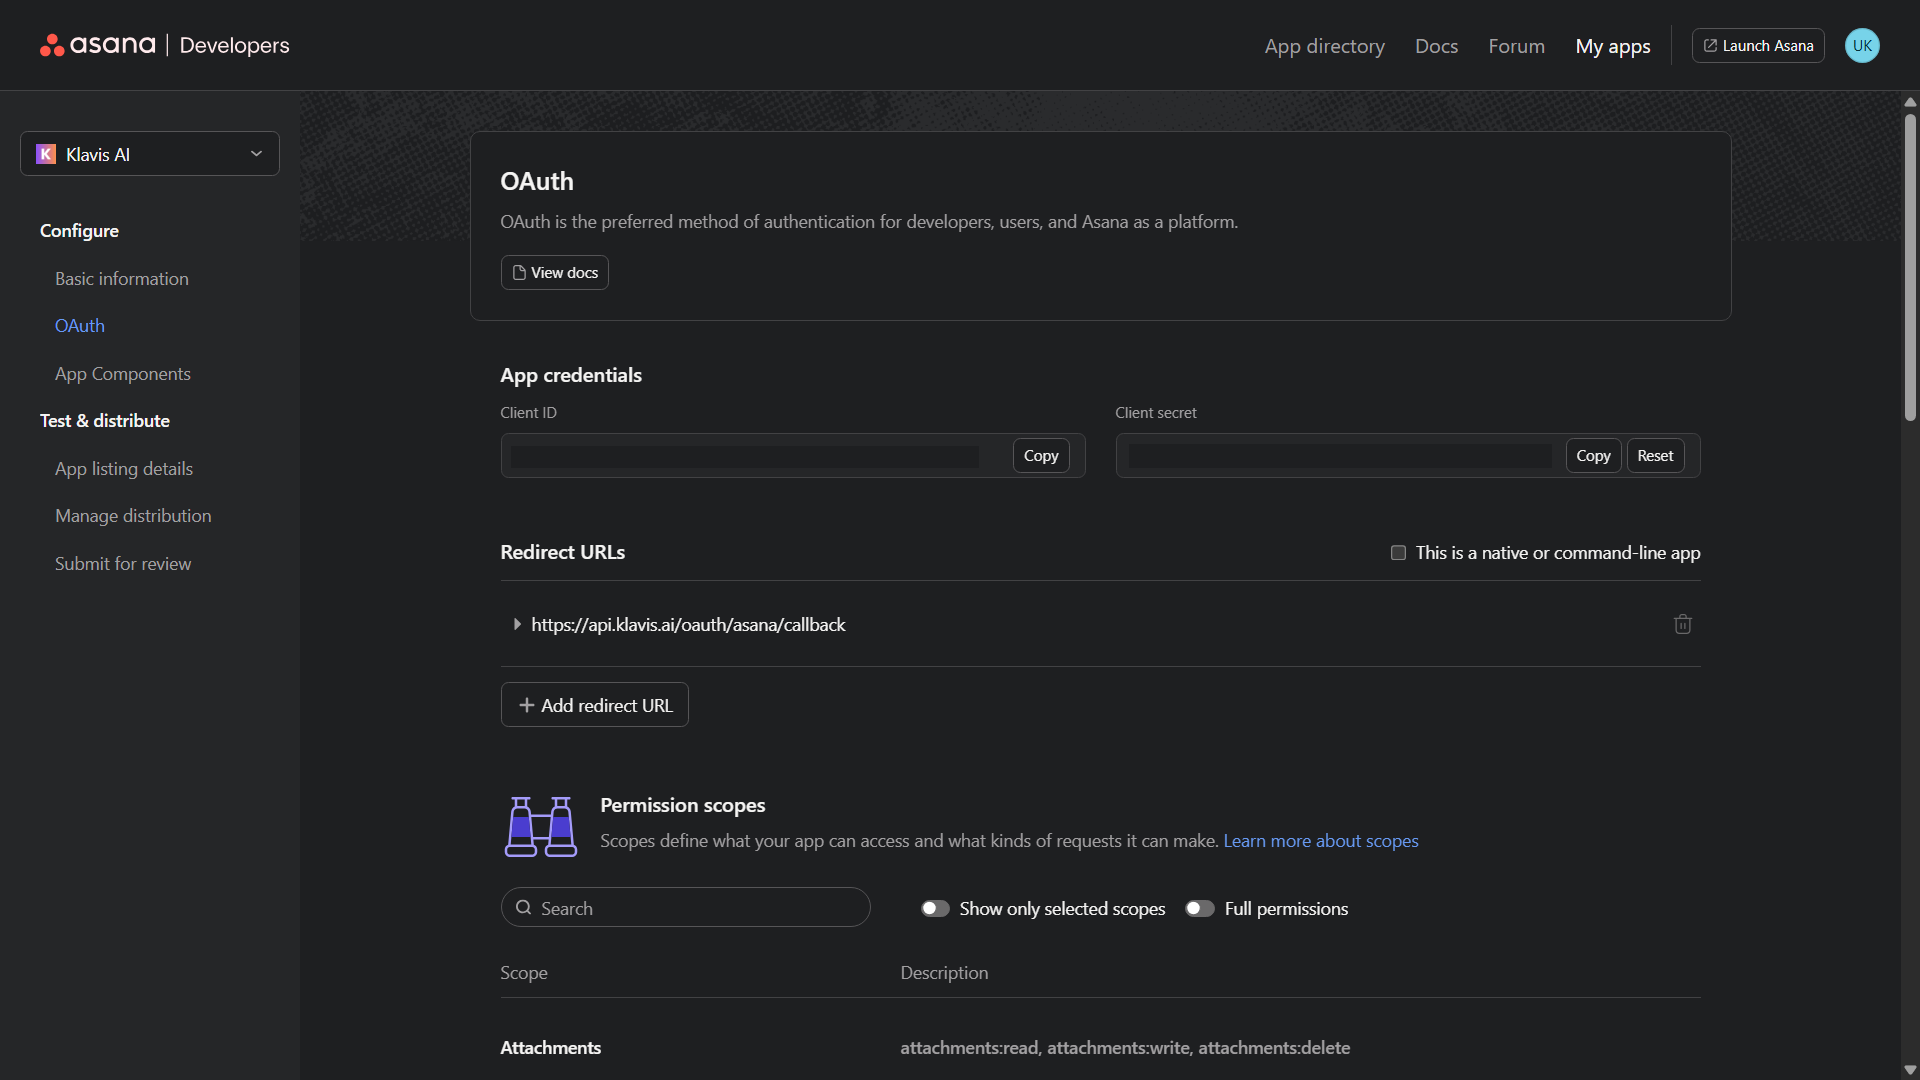
Step 3: Configure OAuth Settings
- After creating the app, you’ll see:
- Client ID: Copy this value
- Client Secret: Copy this value (keep it secure!)
- Redirect URIs: Add your callback URL:
https://api.klavis.ai/oauth/asana/callback
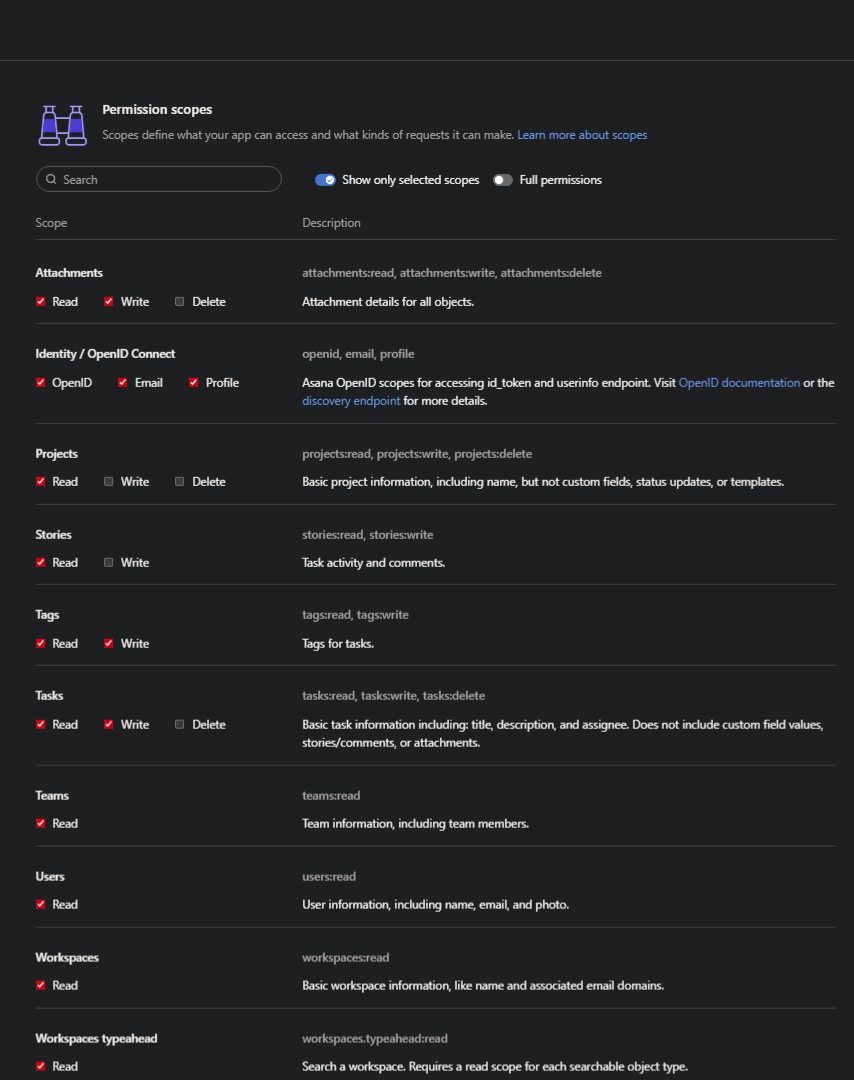
Step 4: Request Scopes
Klavis Asana MCP Server uses the following OAuth scopes:
goals:read,project_templates:read,projects:read,projects:write,projects:delete,stories:read,task_templates:read,tasks:read,tasks:write,tasks:delete,teams:read,users:read,workspaces:read,workspaces.typeahead:read- Scroll to “Permission scopes” tab from “Oauth” menu
- Scopes: Select the scopes your application needs:
You have successfully created an Asana OAuth application! You now have your Client ID, Client Secret, and Redirect Url ready for integration with Klavis AI.
(Optional) Step 5: White Labeling
White labeling allows you to customize the OAuth experience with your own branding instead of Klavis AI’s.
- Configure White Labeling: Go to https://www.klavis.ai/home/white-label
- Add Your Credentials: Enter your Asana Client ID and Client Secret from Step 3
-
Set Redirect URI: Use
https://api.klavis.ai/oauth/asana/callbackor your custom callback URL -
Initiate OAuth: Use your client ID when starting the OAuth flow: