Prerequisites
- Canva account
- Multi-Factor Authentication (MFA) enabled on your Canva account
Step 1: Create Canva Developer Account & Integration
- Visit https://developer.canva.com/ and sign in with your Canva credentials
- Navigate to “Your integrations” page
- Click “Create an integration” and fill out the form:
- Integration type: Choose between “Public” (available to all users after review) or “Private” (team only)
- Integration name: Choose a descriptive name
- Accept Canva’s Developer Terms
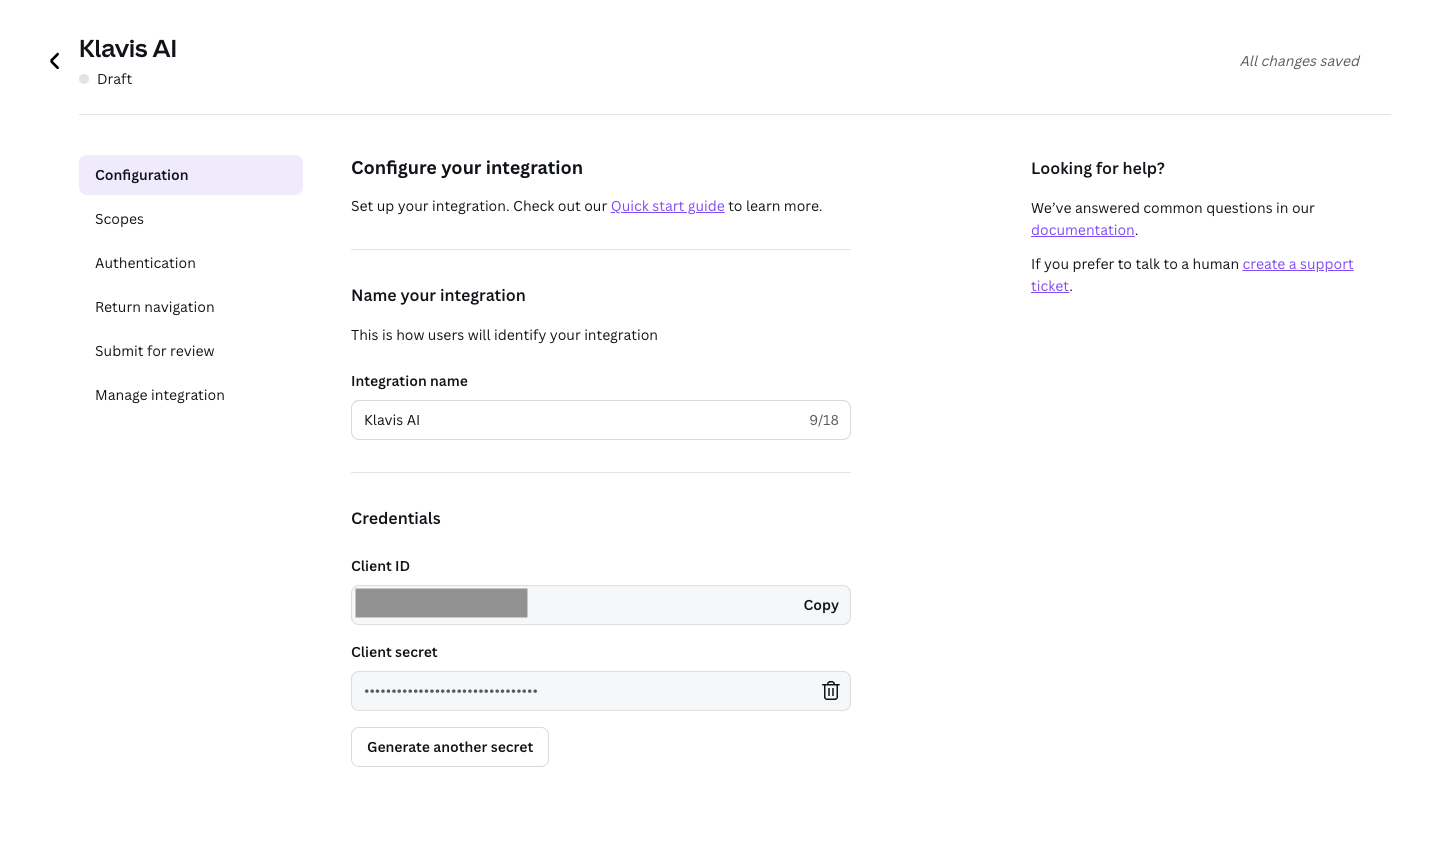
Step 2: Configure Integration Settings
- Under “Configuration” → “Configure your integration”, set the following:
- Integration name: Add your application name
- Client ID: Make note of this value for later use
- Generate secret: Click to generate and securely save your Client Secret
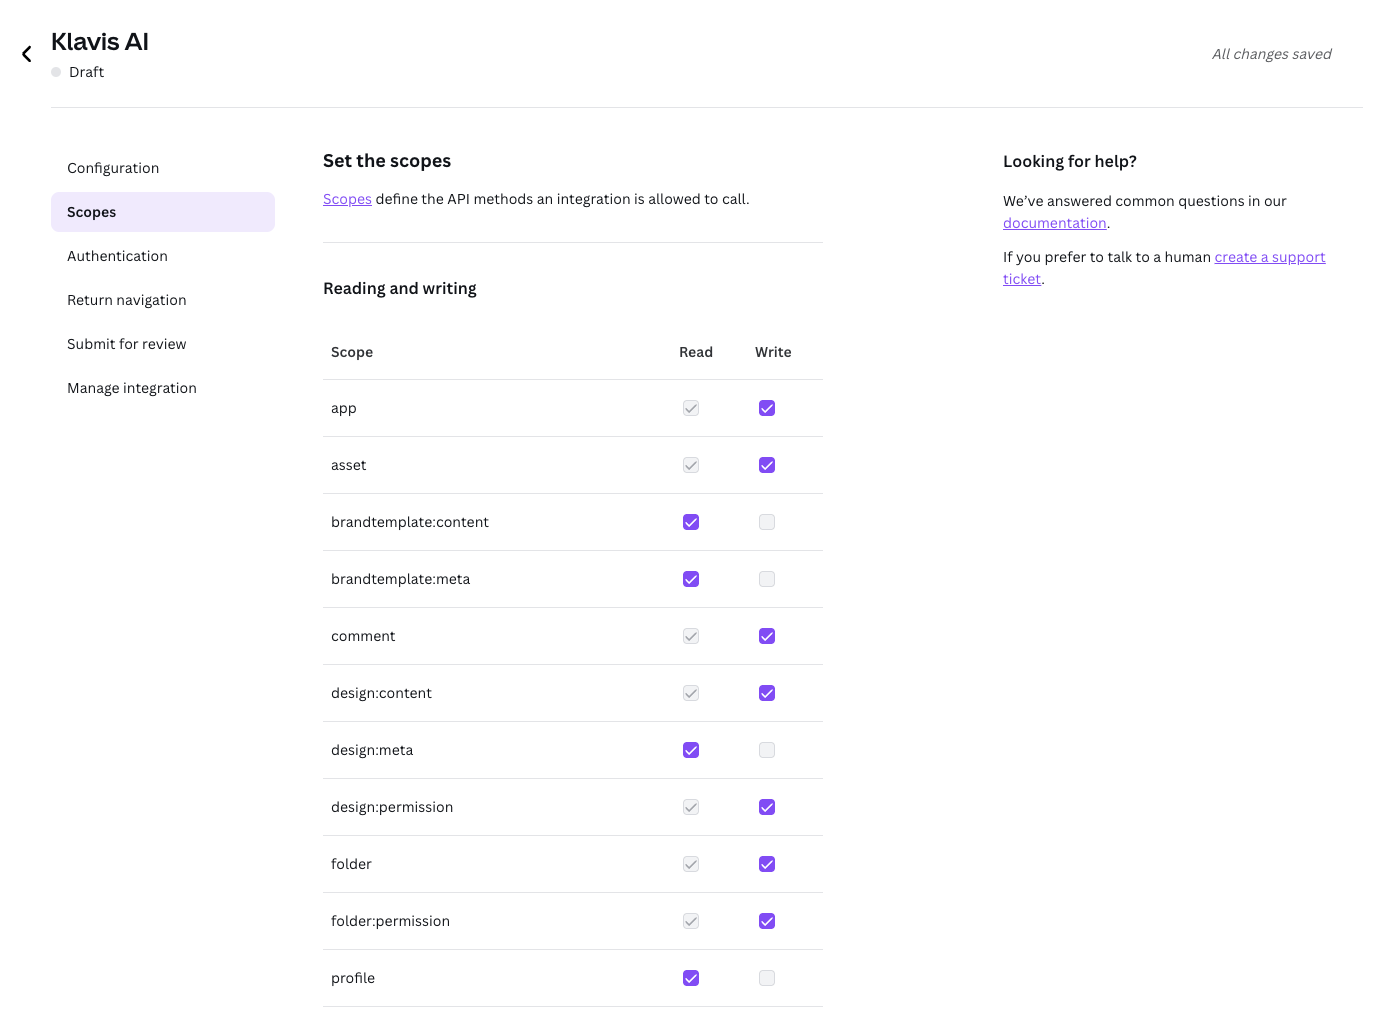
Step 3: Set Required Scopes
Klavis Canva MCP Server uses the following OAuth scopes:
app:read app:write asset:read asset:write brandtemplate:content:read brandtemplate:meta:read comment:read comment:write design:content:read design:content:write design:meta:read design:permission:read design:permission:write folder:read folder:write folder:permission:read folder:permission:write profile:read- Under “Scopes” → “Set the scopes”, configure the required permissions as shown in the screenshot below:
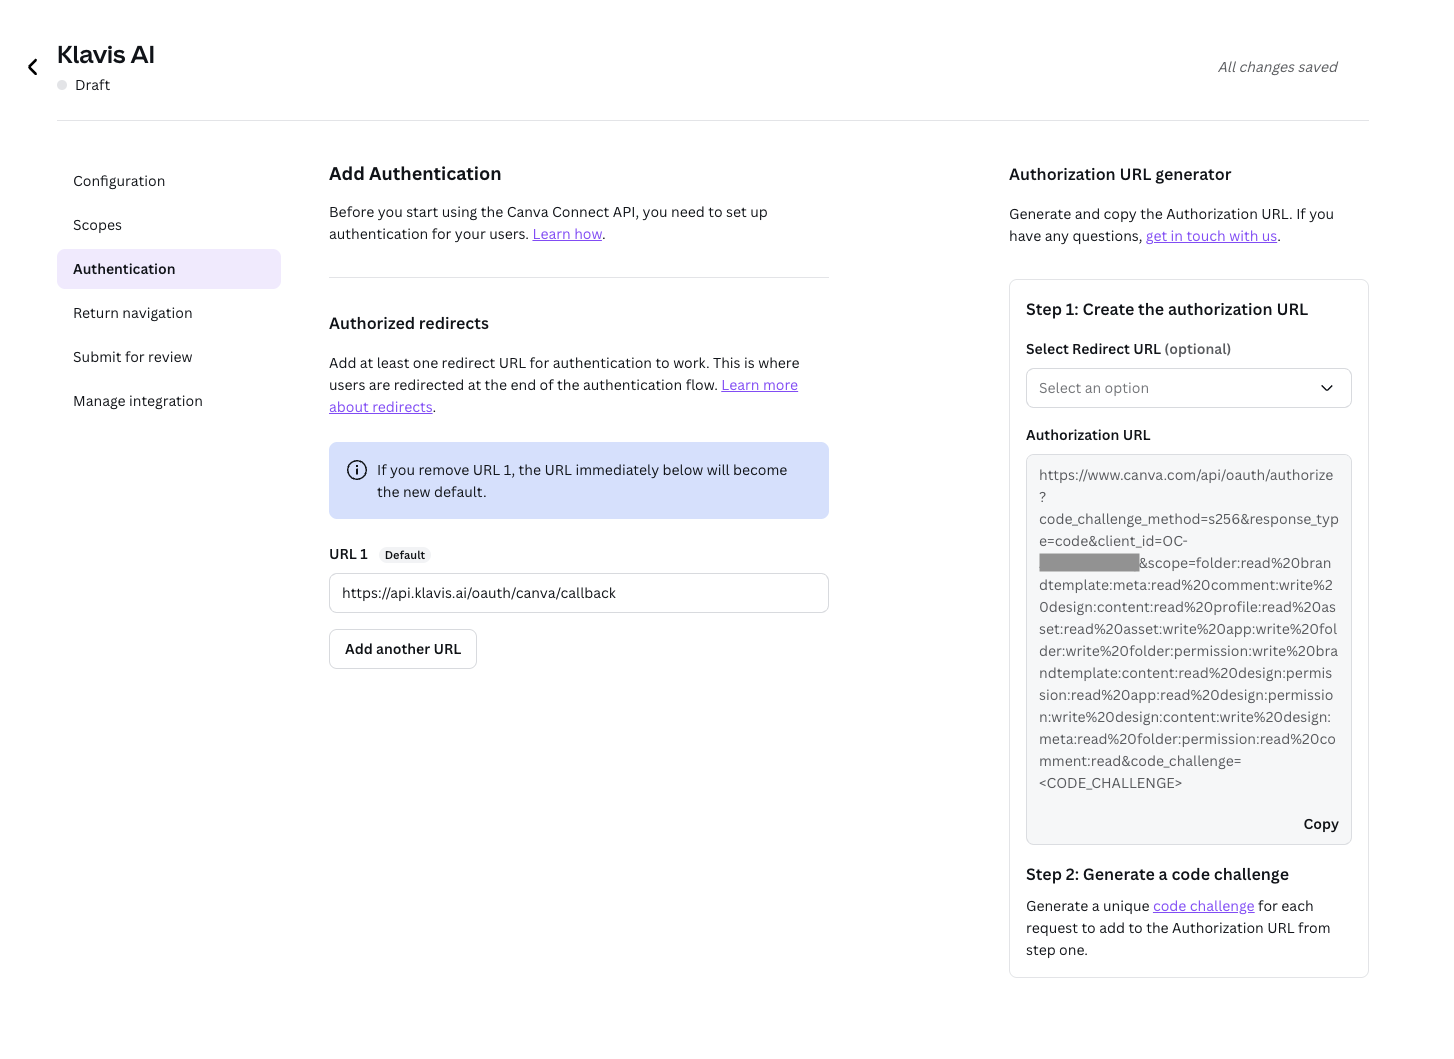
Step 4: Configure Authentication & Redirect URLs
- Under “Authentication” → “Add Authentication”, add redirect URL:
https://api.klavis.ai/oauth/canva/callback
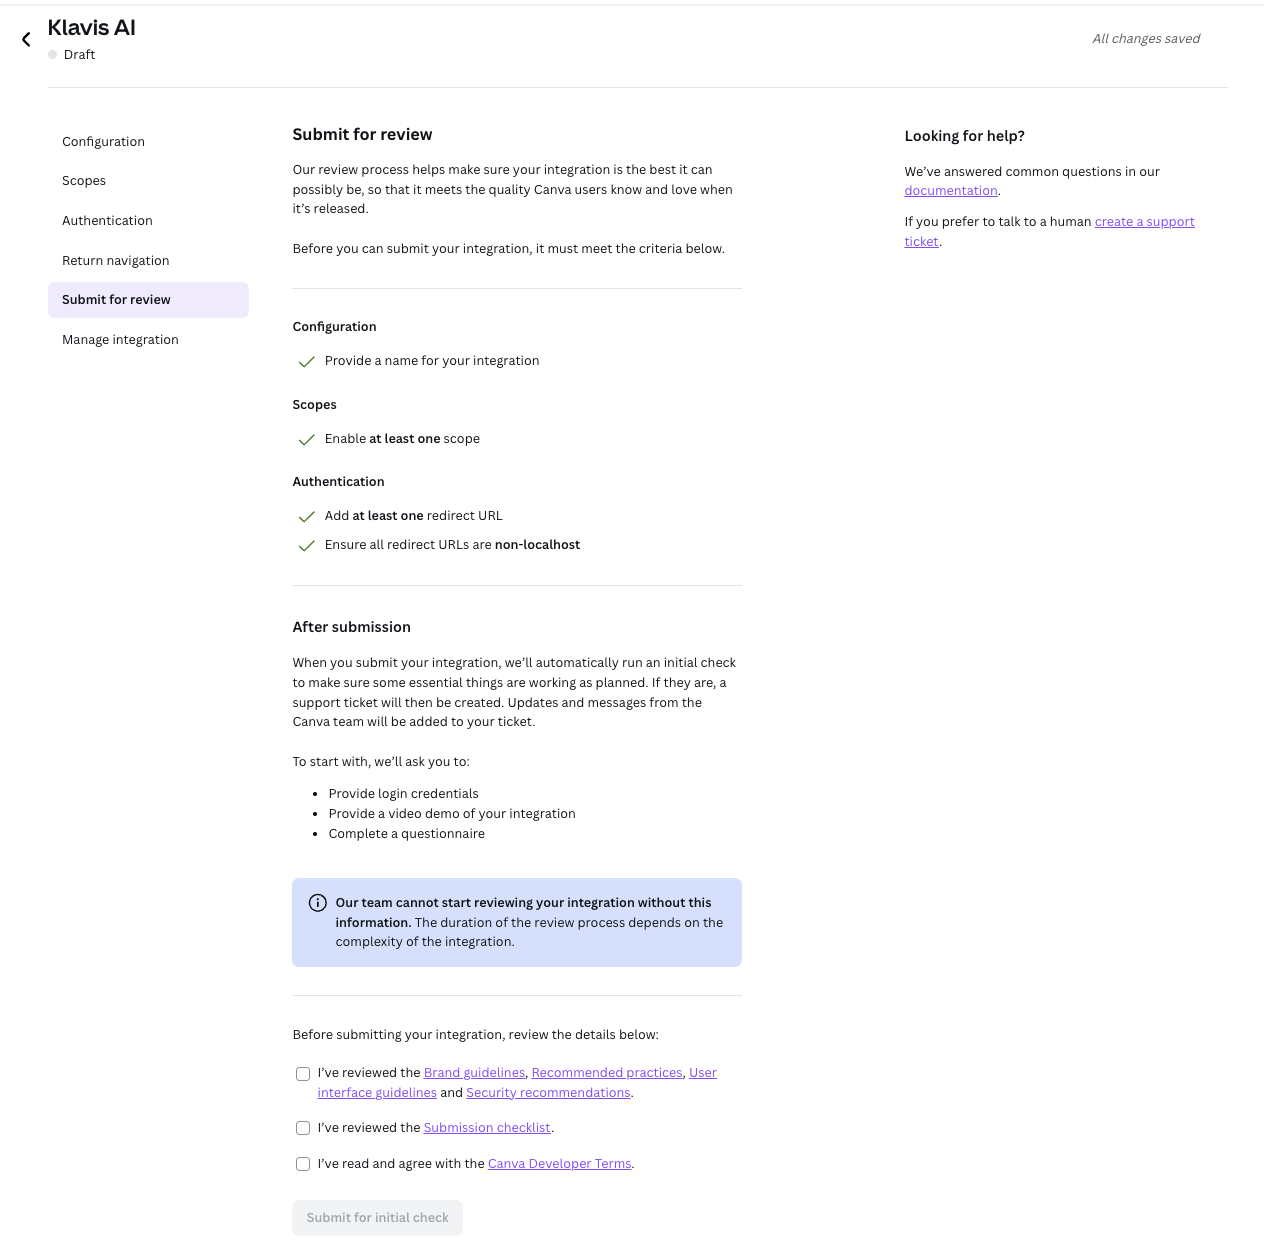
Step 5: Submit for Review (Public Integrations Only)
If you created a “Private” integration, you can skip this step. Private integrations are immediately available to your team.
- Complete all required configuration sections
- Click “Submit for Review”
- Wait for Canva’s approval process
Step 6: Integration Review Status
Once submitted, your integration will show “In Review” status. You’ll receive email notifications about the review progress, and you will be asked to complete a questionnaire in the Jira ticket from the email.
You have successfully created a Canva OAuth application! You now have your Client ID and Client Secret ready for integration with Klavis AI.
(Optional) Step 7: White Labeling
White labeling allows you to customize the OAuth experience with your own branding instead of Klavis AI’s.
- Configure White Labeling: Go to https://www.klavis.ai/home/white-label
- Add Your Credentials: Enter your Canva Client ID and Client Secret from Step 2
-
Set Redirect URI: Use
https://api.klavis.ai/oauth/canva/callbackor your custom callback URL -
Initiate OAuth: Use your client ID when starting the OAuth flow: